

How To Take Great Pictures With Iphone 8
Do you wish you could take better photos with your iPhone 8 camera? One of the easiest ways to achieve this is to start using the iPhone camera settings to their full potential. In this tutorial you'll discover how to use the iPhone 8 camera features to take stunning photos. And you'll learn some little-known tricks to ensure you capture the best quality photos every time you press the shutter.
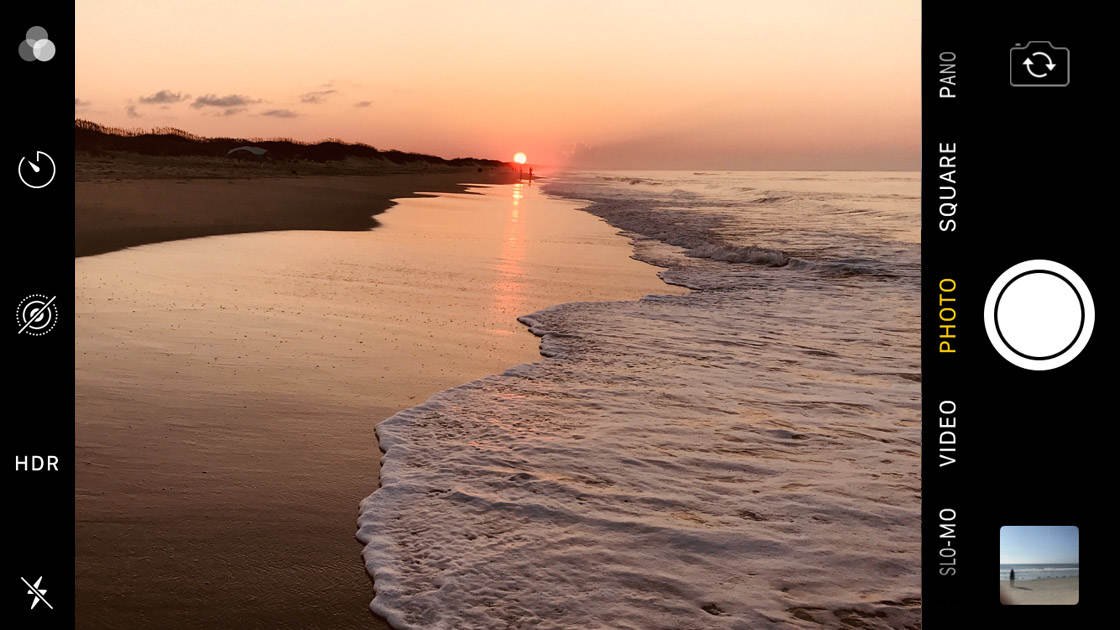
Table Of Contents: iPhone 8 Camera Features
Click any title link below to go straight to that section of the tutorial:
- Quick Ways To Open The iPhone 8 Camera
- Use The Camera Grid To Improve Composition
- Select The Right Shooting Mode
- Choose A Filter To Enhance Colors
- Set Your Focus Point For Sharper Photos
- Adjust Exposure To Control Image Brightness
- Switch On HDR For Perfectly Exposed Photos
- Use The Timer For Hands-Free Photography
- Use Burst Mode For Incredible Action Shots
- Bring Life To Your Images With Live Photos
- iPhone 8 vs iPhone XR & iPhone XS Camera
1. Quick Ways To Open The iPhone 8 Camera
Do you often find that you can't open the native iPhone Camera app in time to capture a fleeting moment in front of you? If you're fed up of missing out on great shots, this section is for you!
With these shortcuts, you can open the camera on iPhone 8 in less than a second! You don't even have to enter your passcode to unlock your phone.
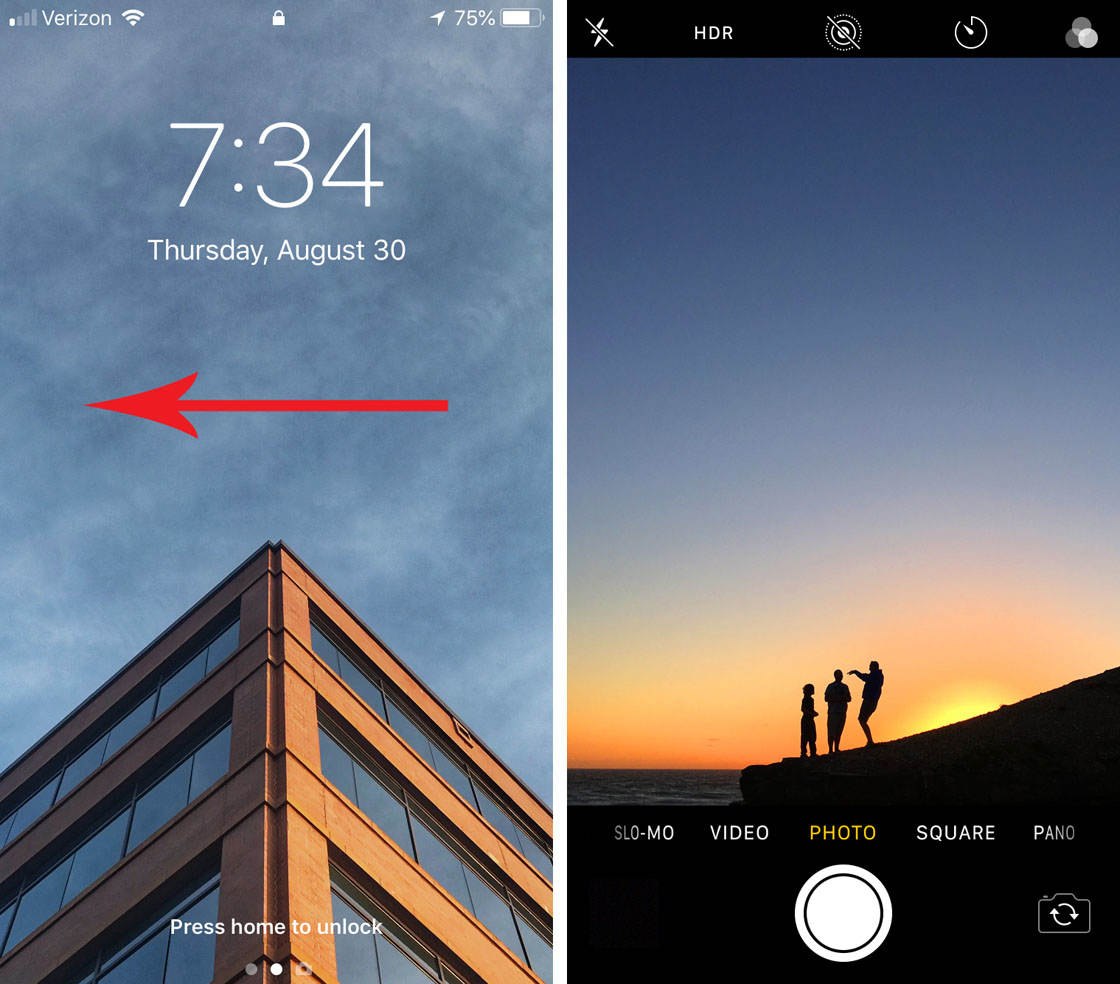
When your iPhone is locked, the easiest way to open the camera is to press the Home or power button, then swipe left. The Camera app will open and you're ready to shoot.
Another way to open the camera from the lock screen is to swipe up from the bottom edge of the screen. This opens the Control Center where you can tap the Camera app icon (shown below).
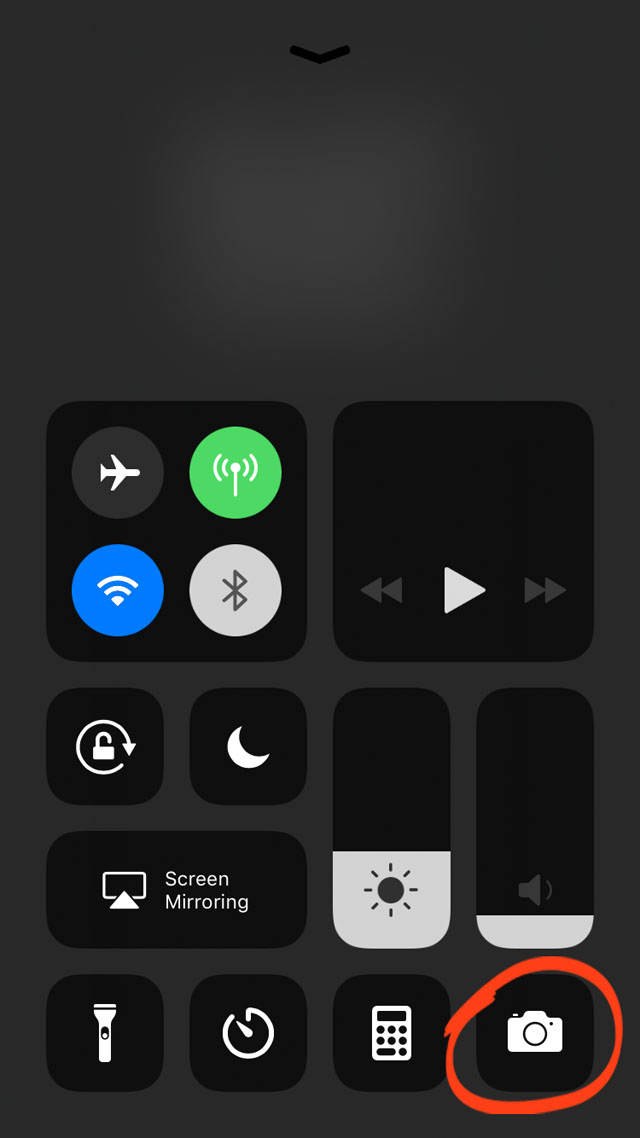
You can also use this method when your iPhone is unlocked. You don't have to be at the Home screen to access the Control Center. So it's a great way to quickly open the camera without having to close the app that you're currently using.
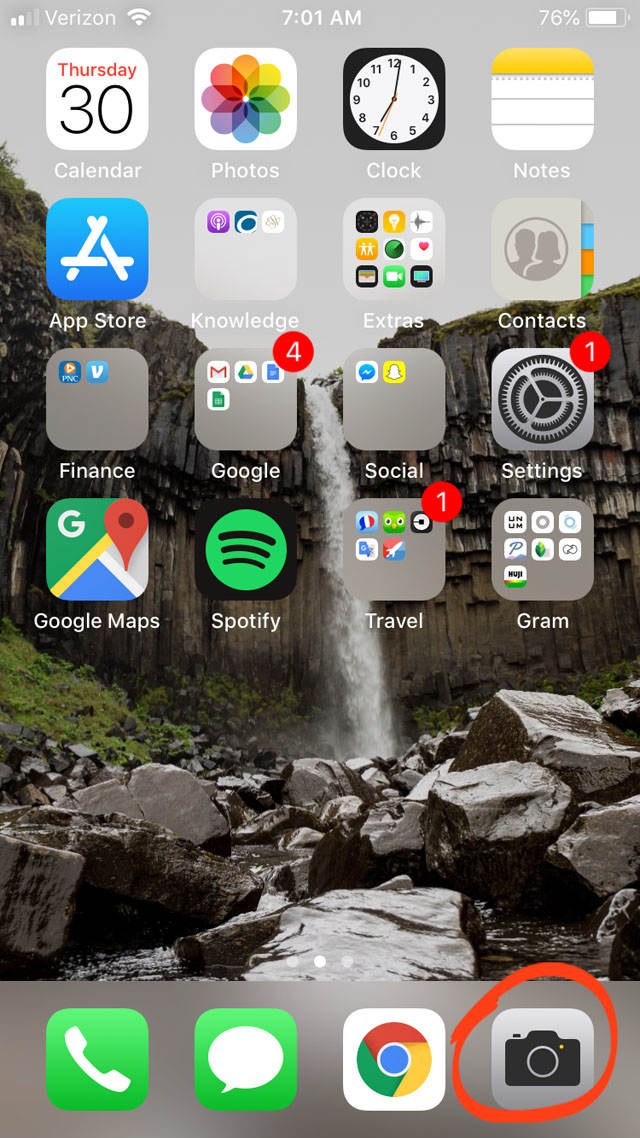
Of course, if you're at the Home screen, you can tap the Camera app icon there. It's a good idea to move the Camera icon into the dock at the bottom of the screen so that it's always easy to find. Tap and hold the icon until it starts to jiggle, then drag it to the dock. Press the Home button when you're done.
Knowing how to open the camera as quickly as possible is the first step to taking stunning iPhone photos. With these shortcuts you can capture amazing fleeting moments that you'd otherwise miss.
2. Use The Camera Grid To Improve Composition
The iPhone 8 Camera app includes a built-in grid that helps you compose your photos. You can use the gridlines to ensure your pictures are level. And it's perfect for helping you compose your shot using the rule of thirds.
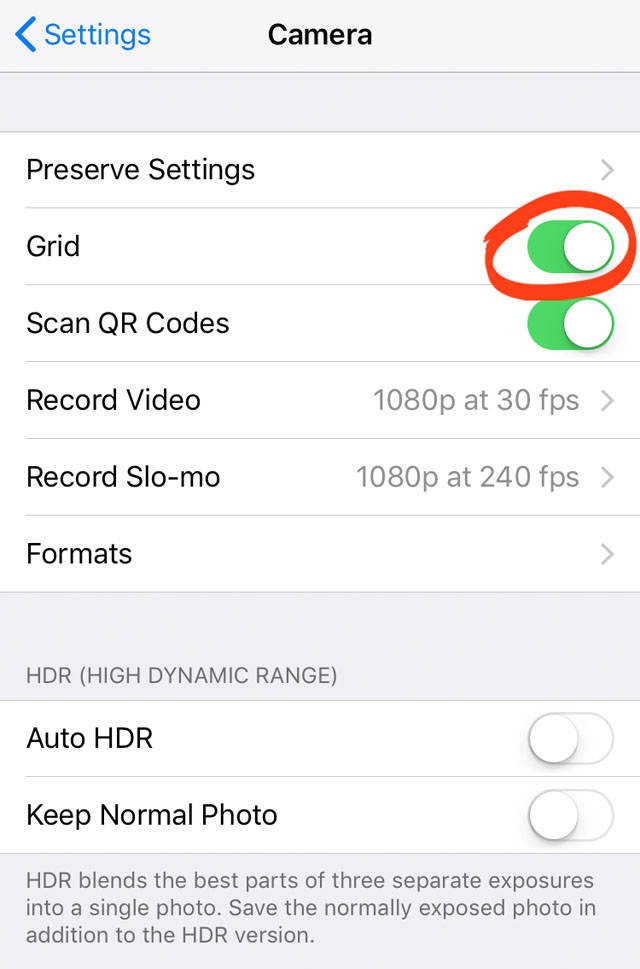
To switch on the camera grid, go to the Settings app. Scroll down and select Camera, then turn the Grid option on (green).
When you open the Camera app, you'll see the rule of thirds grid in the viewfinder.
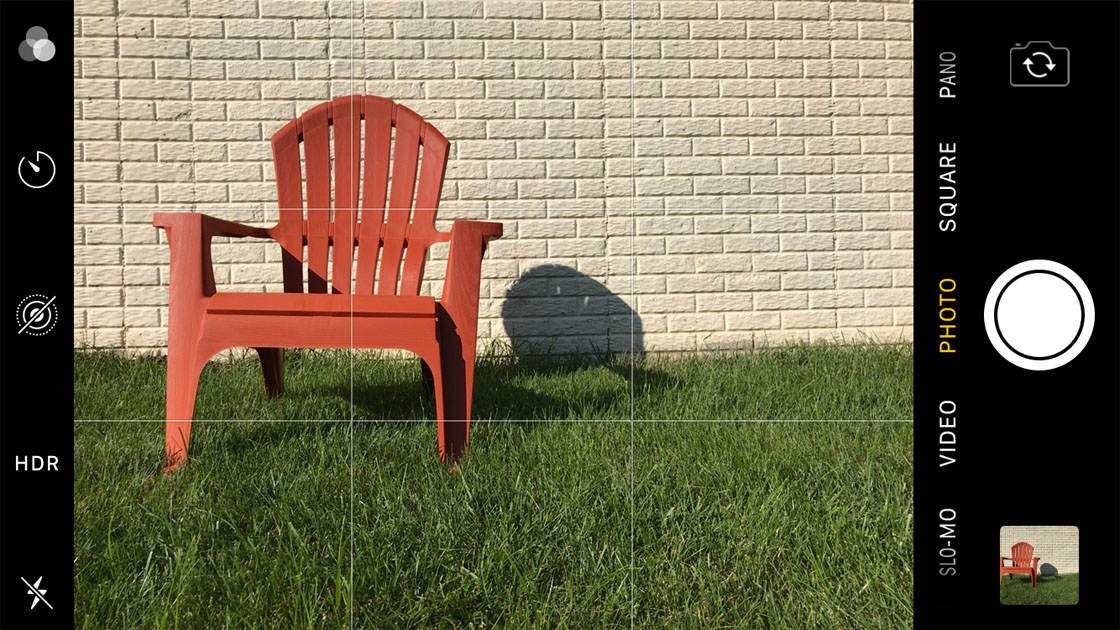
The Rule of Thirds is a classic composition technique. It states that placing your subject off-center creates a more visually pleasing image.
So rather than having your subject in the middle of the frame, place it on one of the intersections where the gridlines meet.
If you're shooting landscapes, position the horizon on the top or bottom gridline. This usually looks better than having the horizon across the middle of the frame.
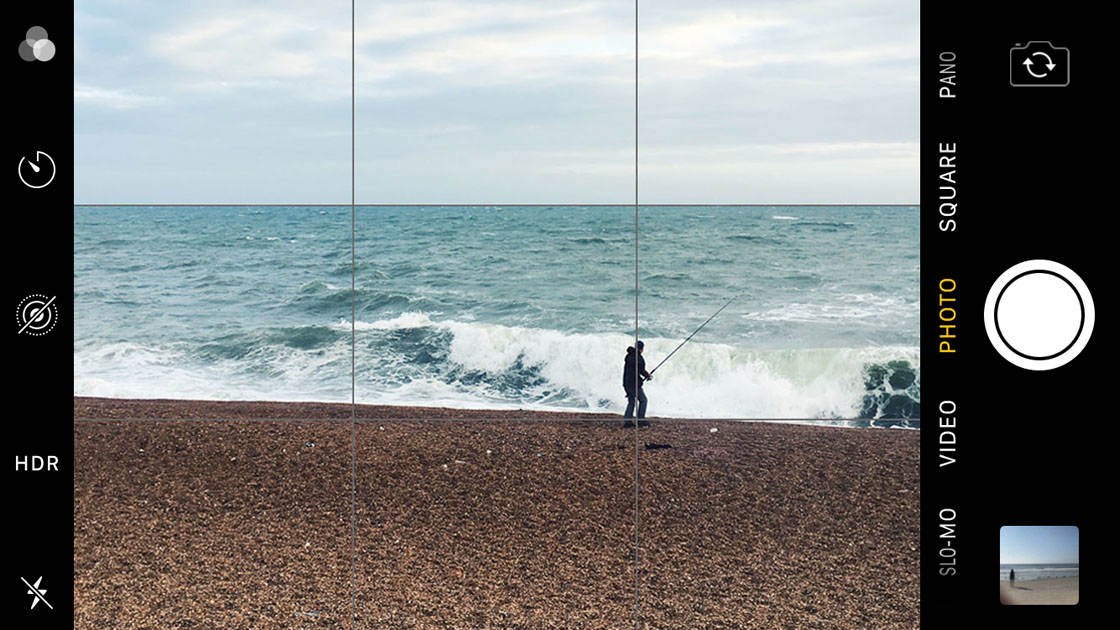
You should also use the gridlines to ensure your camera is level before pressing the shutter. This is particularly important in landscape photography. When composing your shot, line a horizontal gridline up with the horizon line. The result will be a perfectly level photo!
Good composition is the key to creating eye-catching photos. So turn on the iPhone 8 camera grid, and use it to help you compose the perfect shot!
3. Select The Right Shooting Mode
The iPhone 8 Camera app has six shooting modes to choose from. These help you take the best photos or videos possible for the situation you're in.
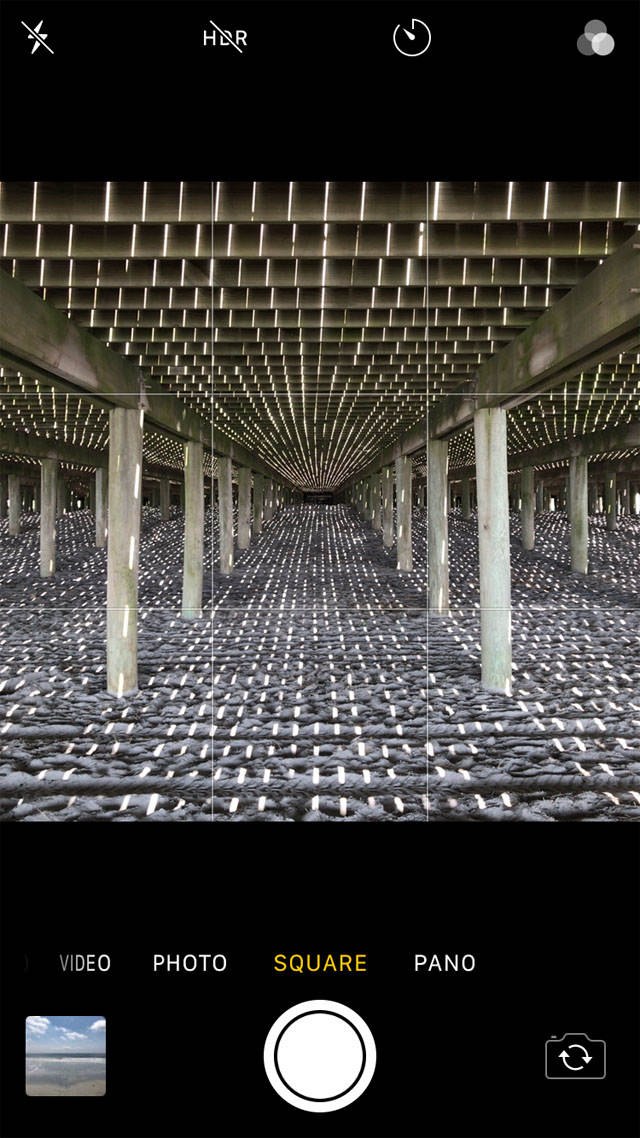
To select a shooting mode, swipe left or right until the mode you want appears in yellow at the bottom of the screen. The available shooting modes are Time-Lapse, Slo-Mo, Video, Photo, Square, and Pano.
In this section you'll discover what each shooting mode is for, so you're equipped for every photo opportunity.
Photo mode is the default iPhone 8 camera mode. It captures photos in standard rectangular format. This results in wide horizontal photos and tall vertical photos.
Square mode takes your photo in square format. Some people prefer the look of square photos. And sometimes a subject fits better into a square frame than a rectangular one. This shooting mode is also great if you like to post square images on Instagram.
If you're unsure whether you want a rectangular or square photo, shoot in Photo mode. You can then crop to square format using a photo editing app.
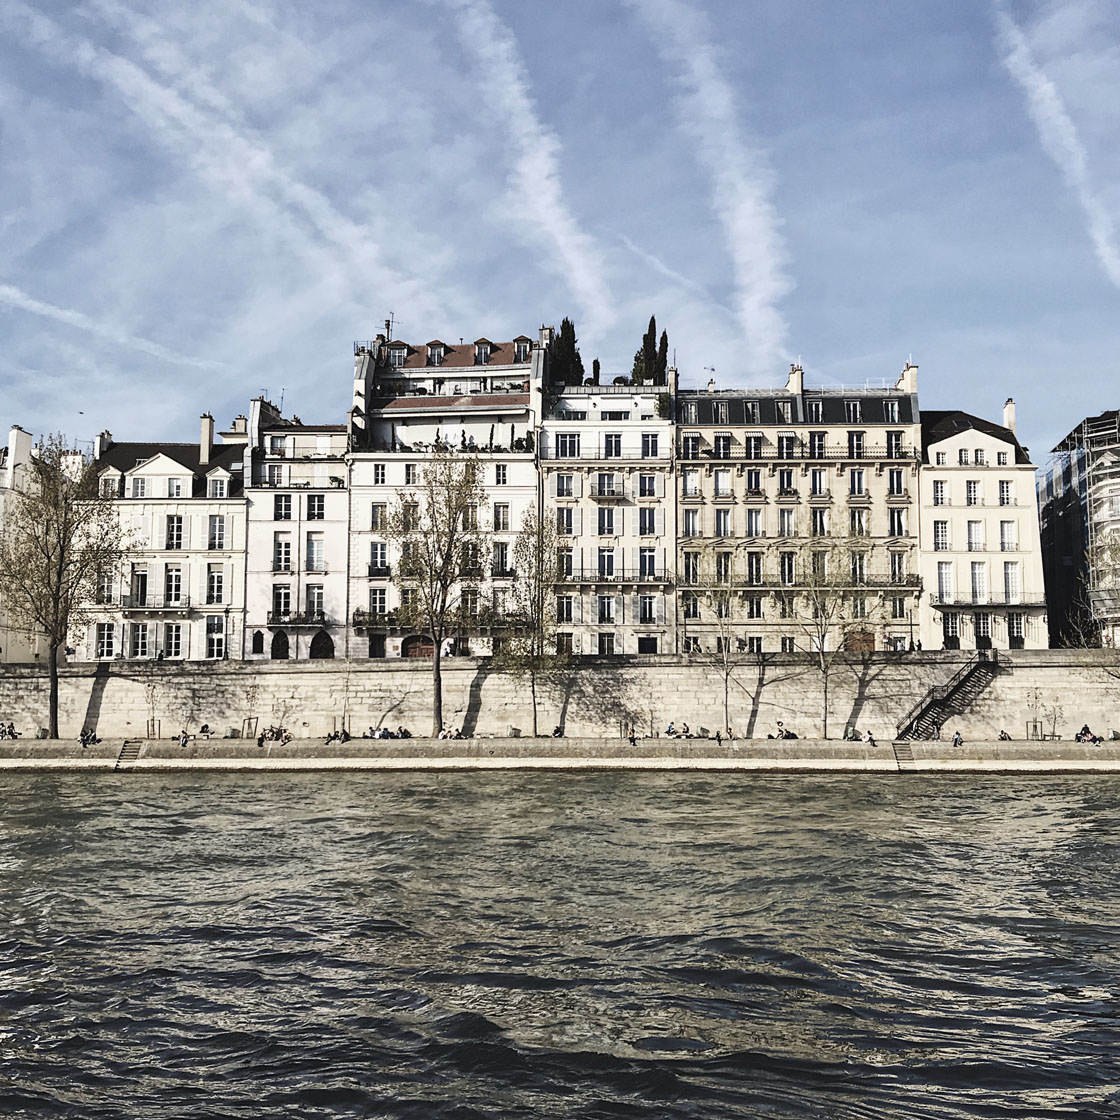
Pano mode lets you take ultra-wide panoramic photos. This is great for capturing wide landscapes and cityscapes.
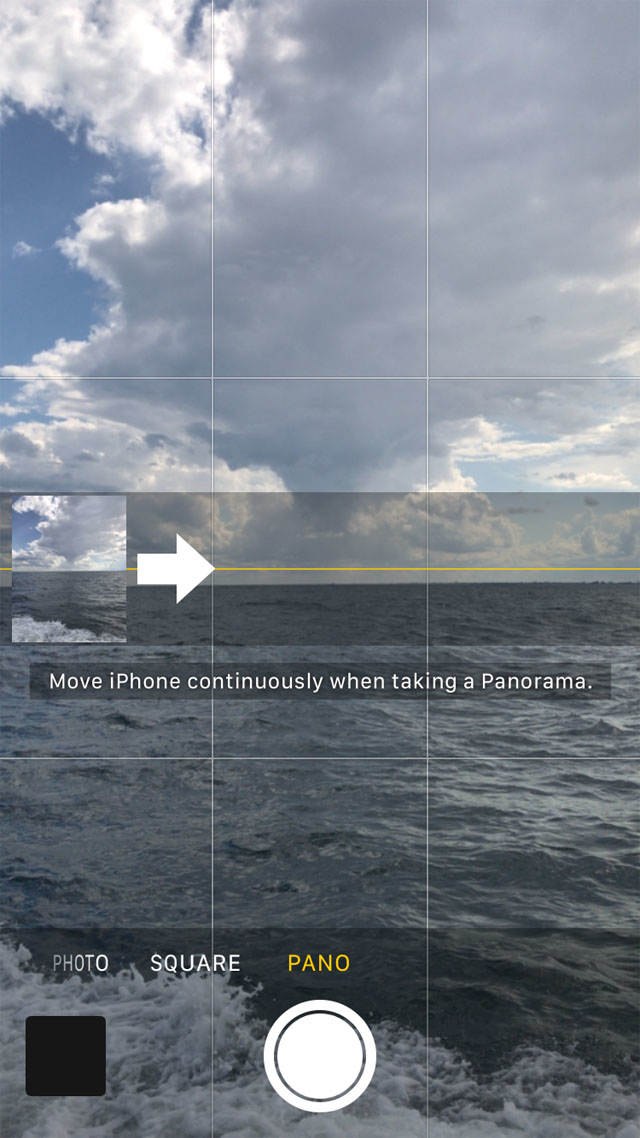
To shoot a panorama, hold your iPhone in vertical orientation. Tap the shutter button, then move your camera slowly across the field of view. Follow the direction of the arrow, and keep your phone steady while panning across the scene. To pan in the opposite direction, tap once on the arrow to turn it the other way.
Video mode allows you to shoot home movies with your iPhone. Tap the red Record button to start recording video footage, and tap it again to end.
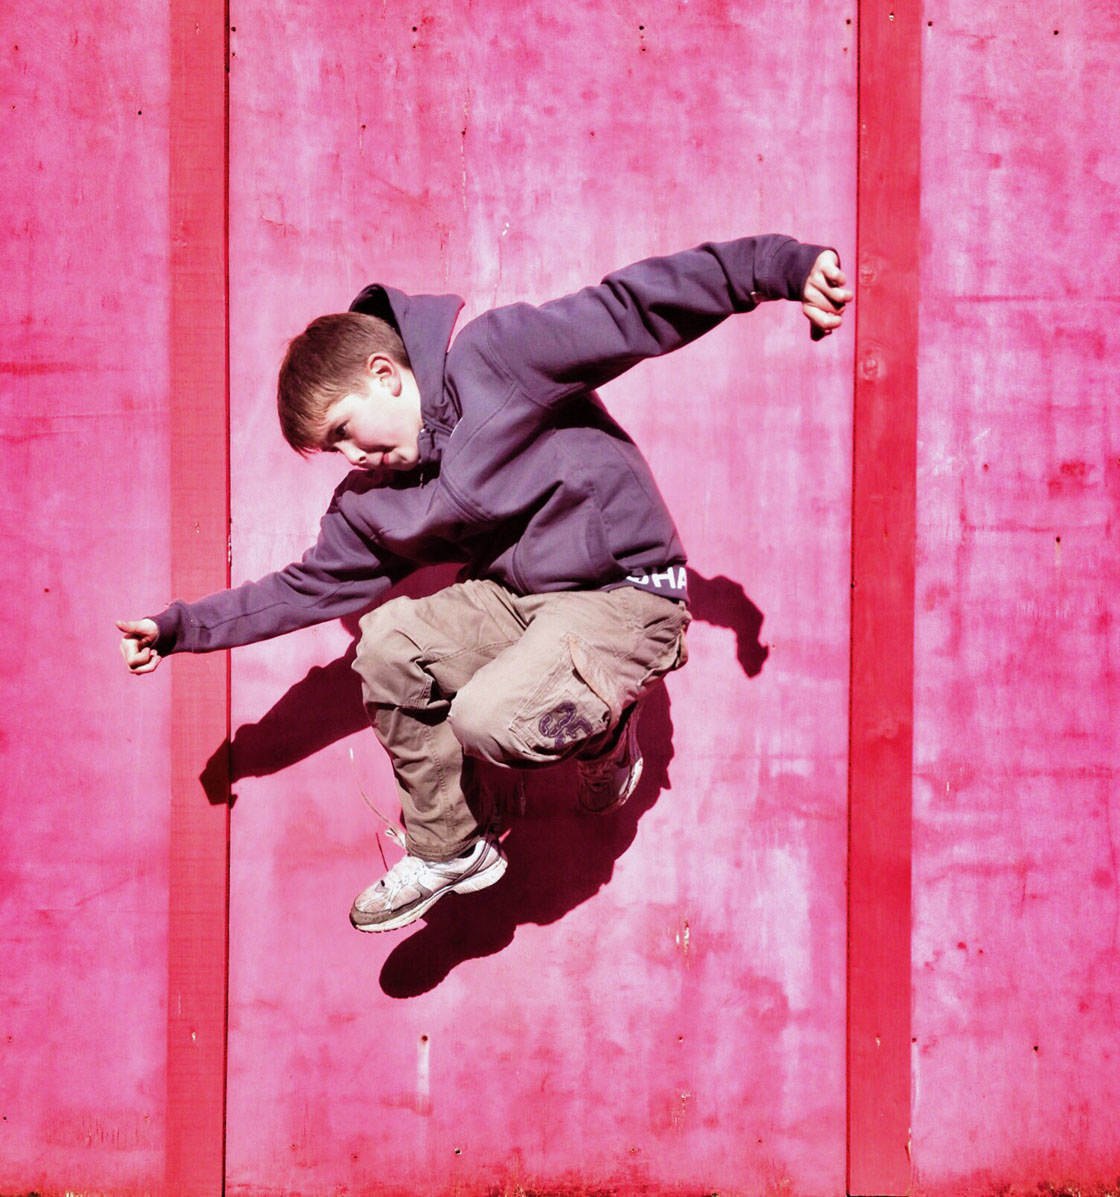
Slo-Mo mode lets you record videos in slow motion. This is perfect for capturing high-speed subjects and action shots. Try creating a Slo-Mo of a person jumping in the air. Or how about capturing waves as they crash onto rocks at the beach?
Time-Lapse mode allows you to create a sped-up clip of video. This mode is great for showing how a scene changes over a period of time. Try shooting a time-lapse of the sun setting over the ocean as the tide comes in, or clouds as they move across the sky.
Choosing the best shooting mode for your scene means you'll capture the most engaging photos and videos possible.
4. Choose A Filter To Enhance Colors
The iPhone 8 Camera app comes with nine pre-loaded filters. These iPhone filters add color saturation, contrast, clarity, and drama to your photos.

You can apply a filter after you've taken the photo using the native Photos app. But did you know you can also apply filters at the time of shooting?
If you shoot with a filter applied to your photo, you may not need to do any editing after taking the picture. And the great thing about this feature is that the filters are non-destructive. This means you can change the filter, or remove it completely, at any time. You do this using the Edit option in the native Photos app.
To access the filters in the Camera app, tap the Filters icon (three overlapping circles) at the top right corner.
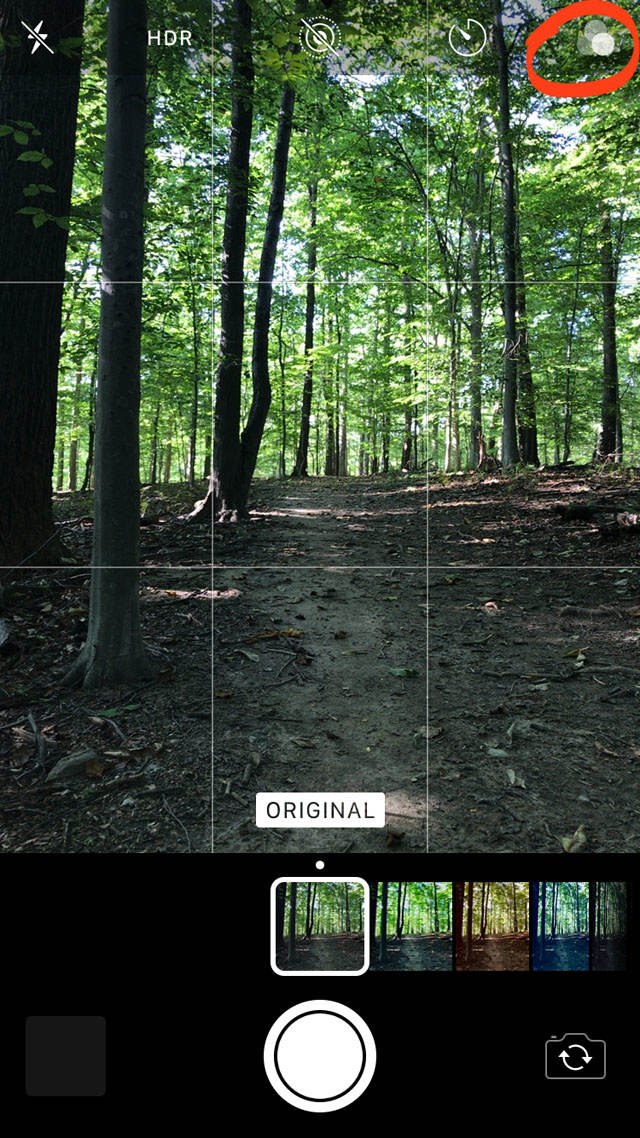
Swipe through the filters at the bottom of the screen until you find one you like. If you decide you don't want to use a filter, select Original.
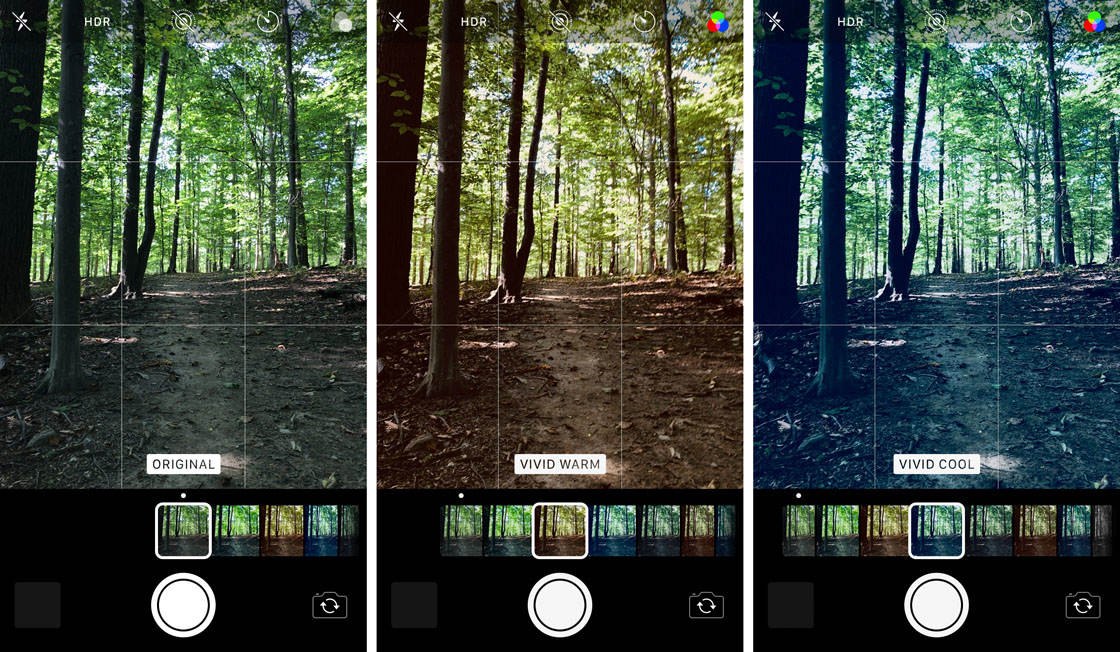
There are three categories of filters: Vivid, Dramatic, and Black & White. The Warm filters add yellow/orange hues to your photo, and the Cool filters add blue tones.
These different filters can dramatically change the mood of your photo. So ensure you choose a filter that suits the scene and creates the mood you want to convey.
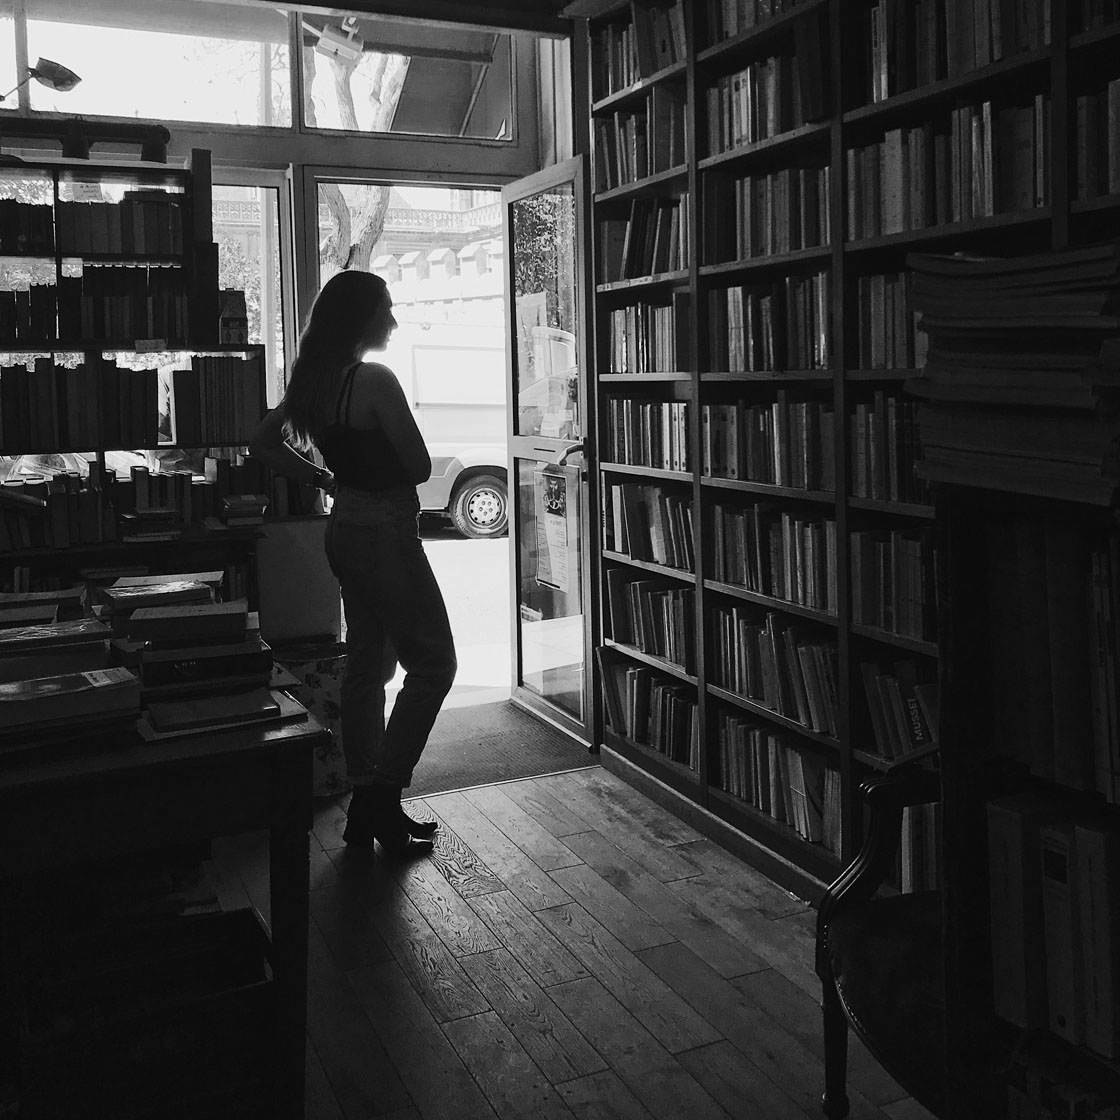
The black and white filters (Mono, Silvertone and Noir) are perfect for creating a timeless feel. They can emphasize contrast in a scene, and add drama to your image. You can also use them to remove distracting colors from the final image.
Not every photo looks good with a filter. But masterful use of filters in the appropriate situations can yield stunning photos.
So get out there and experiment with different color and black and white filters. And remember, you can always remove or change the filter after taking the photo.
5. Set Your Focus Point For Sharper Photos
Do your photos sometimes turn out blurry and unclear? It definitely doesn't have to be this way! The iPhone 8 camera quality is amazing. It's capable of capturing pin-sharp images. You just need to know how to set the focus correctly.
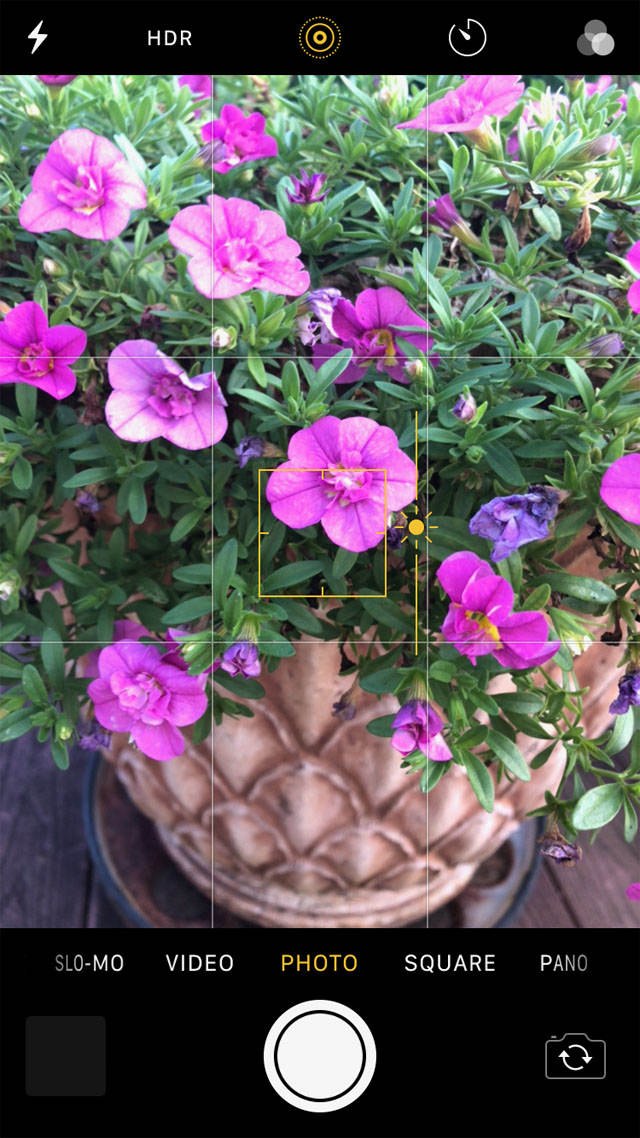
When you've composed your shot, tap the screen to set the focus point. Normally you'd want your main subject to appear in sharp focus. The yellow focus box will appear over the area that you tap.
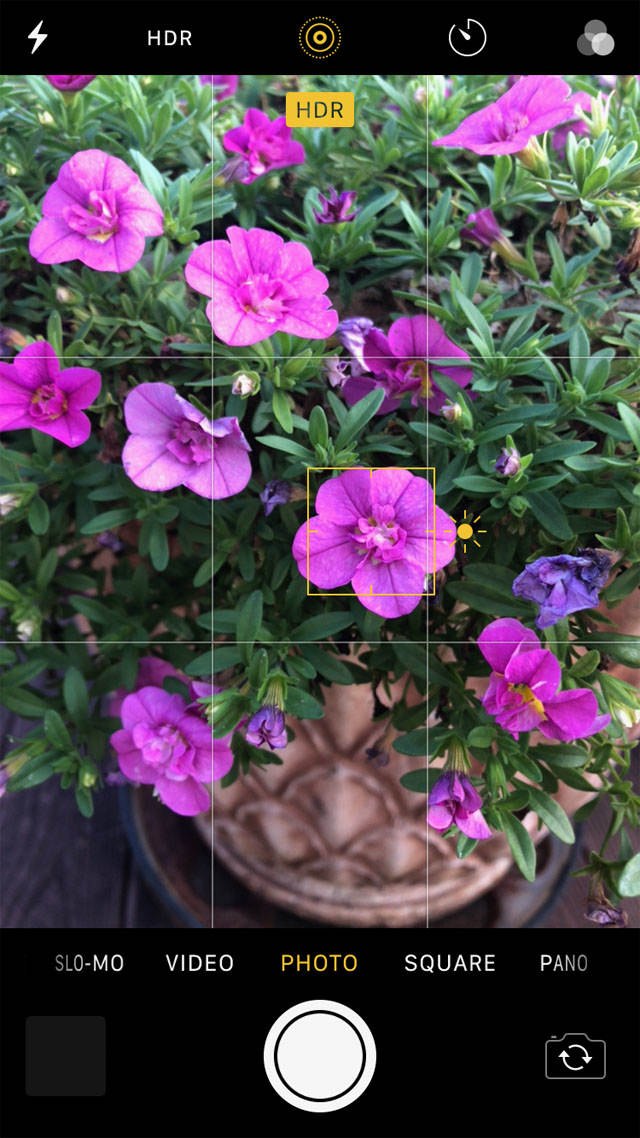
Setting the focus ensures the camera focuses on the area that's most important. The focal point will be clear and sharp, while anything in front of or behind it may appear blurred or slightly out of focus.
If you don't set the focus point, the camera will decide which area of the scene should be in focus. While it might do a good job most of the time, it won't always get it right. You'll get better and more predictable results by setting the focus point yourself.
When photographing close-up subjects, setting the focus is extremely important. The closer you are to your subject, the shallower the depth of field will be. A shallow depth of field means that only a small part of the image will be in sharp focus. Anything behind or in front of it appears blurred.
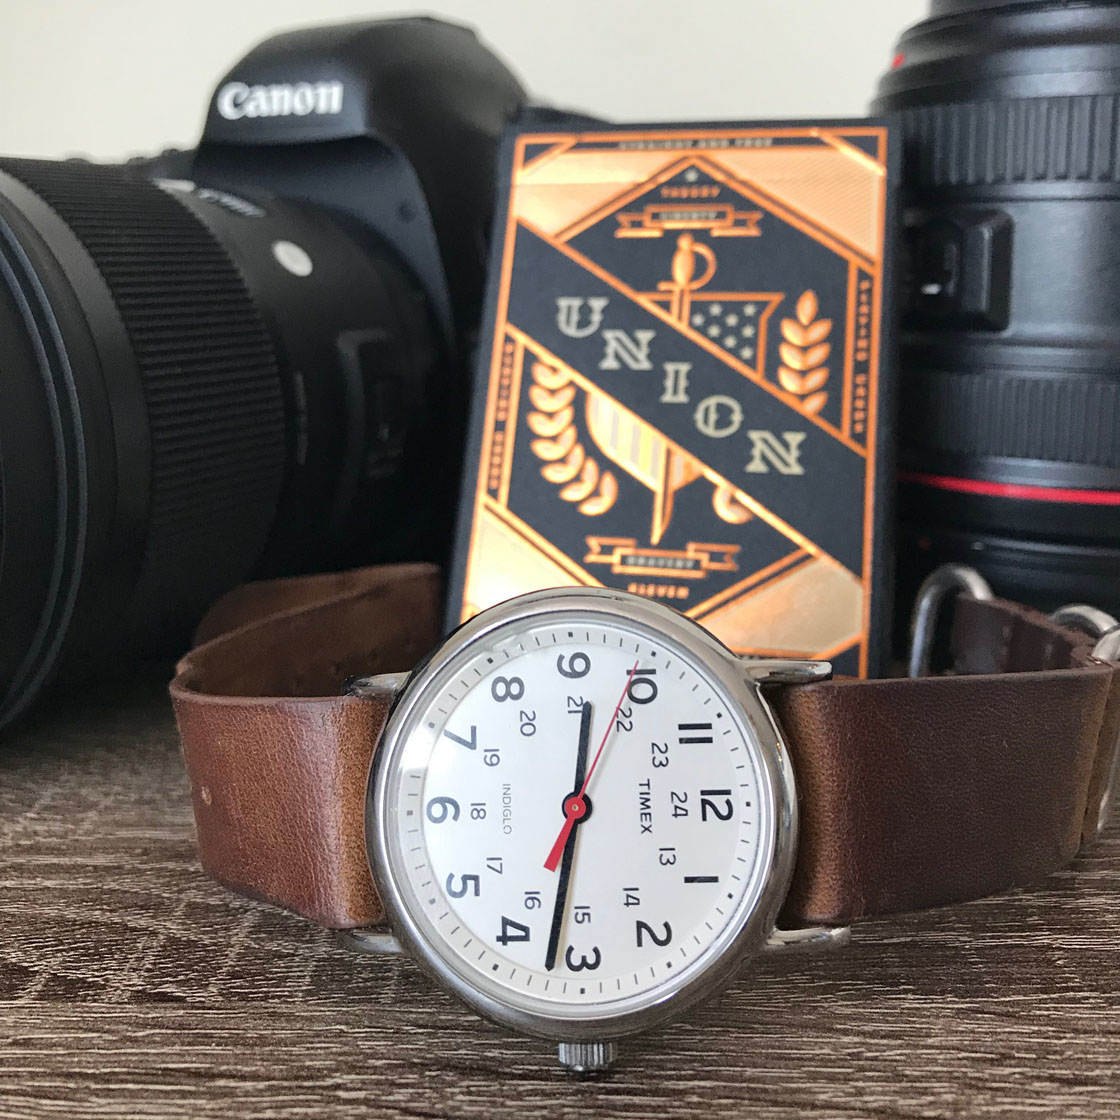
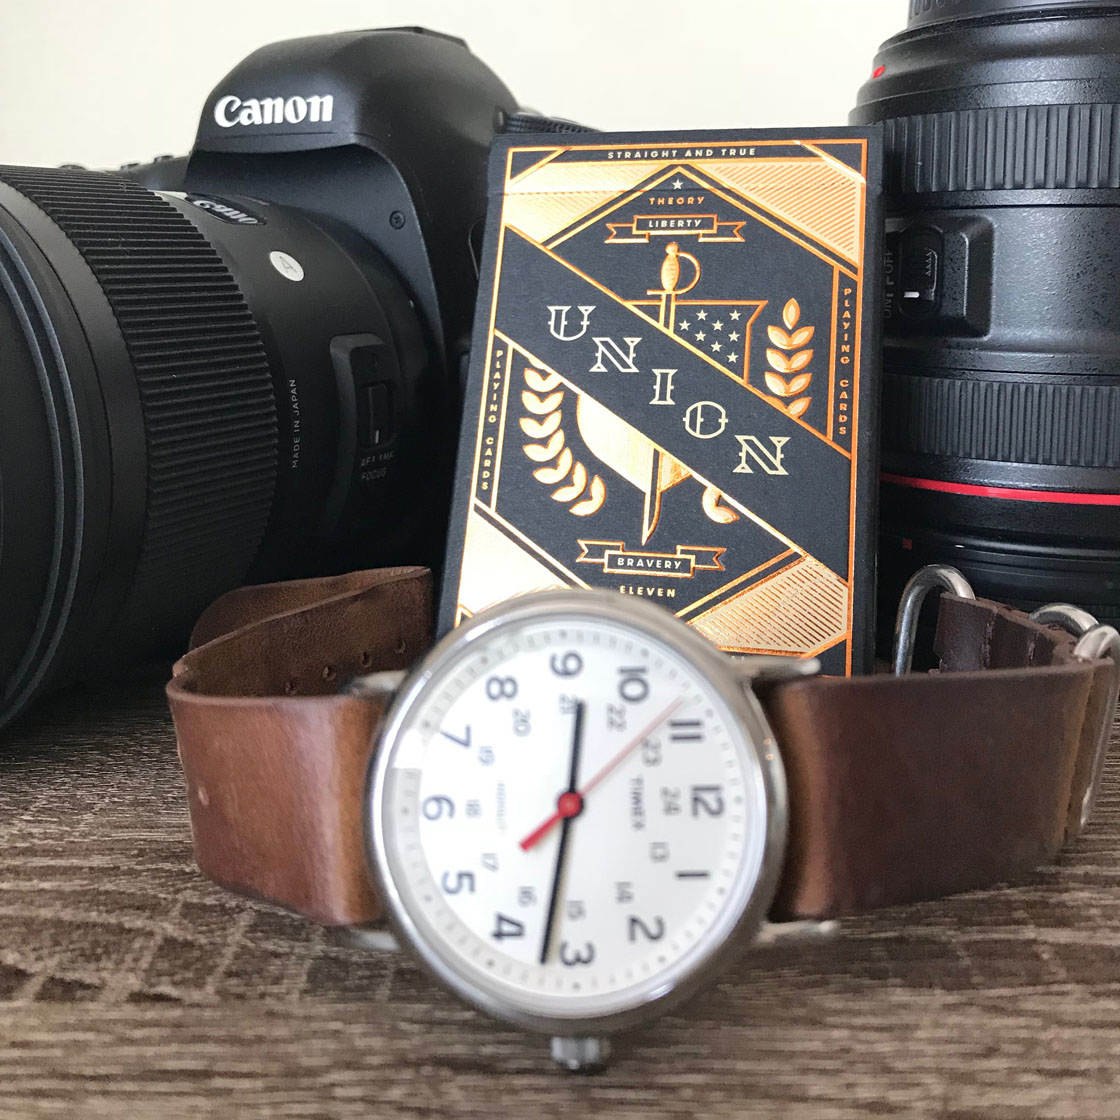
The two photos below show how you can set focus on different parts of the scene. Tapping the area you want in focus lets you control which parts appear sharp and which appear blurred.
In the first photo the focus was set on the face of the watch. That part of the scene appears crisp and clear, while the background objects are out of focus.
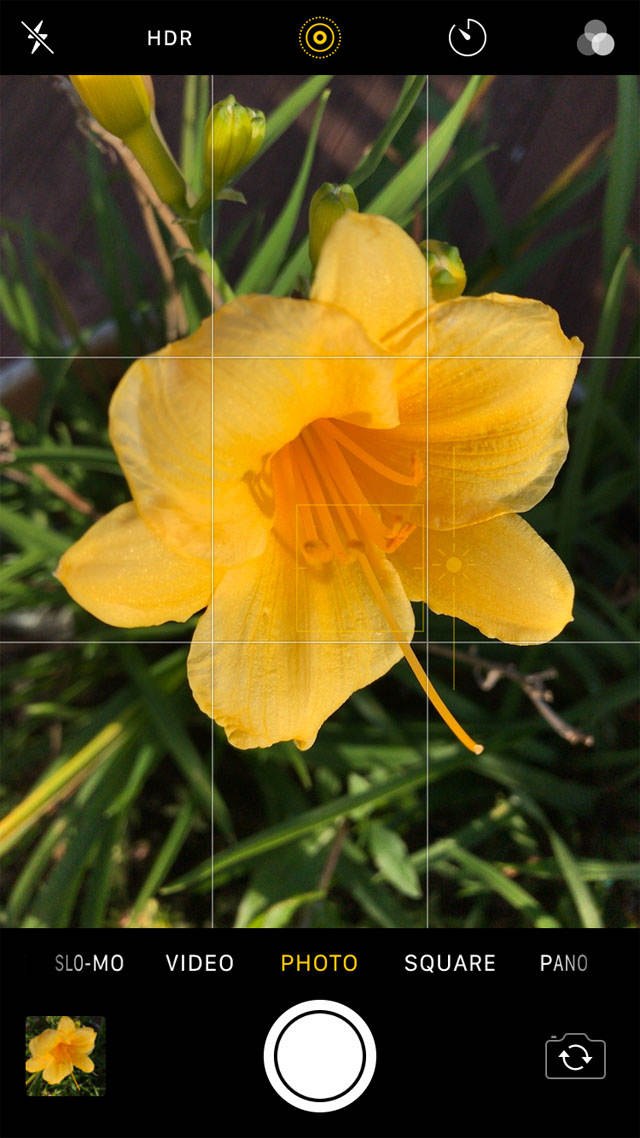
The second image shows what happens when focus is set on the deck of cards in the background. Now that area of the scene is in focus, while the watch in the foreground is blurred.
The iPhone Camera app also has a Focus Lock feature (AE/AF Lock). Locking focus means you can take many shots of a scene without having to set the focus point each time. It also means the iPhone won't automatically reset the focus point if a new subject enters the scene.
To lock focus, tap and hold until you see AE/AF Lock at the top of the screen. When you take a photo, the focus remains locked at that point for the next shot. So you can take more photos of the same scene without having to set focus each time. When you no longer want the focus locked on that area, tap anywhere on the screen to exit AE/AF Lock.
Setting the focal point every time you take a photo ensures your subject is always crisp, clear and sharp. Using this technique will definitely improve your iPhone 8 photography.
6. Adjust Exposure To Control Image Brightness
The exposure setting in the iPhone Camera app lets you control how bright or dark your photo is. This helps you avoid taking under-exposed (too dark) or over-exposed (too bright) images.
It also gives you creative control over the tone or mood of your photo. You can brighten the exposure to communicate a happy or carefree mood. Or reduce the exposure to create a dark and moody vibe.
So where is the exposure setting in the iPhone 8 Camera app? This is one of those hidden iPhone camera features that most people don't even realize is there!
When you tap the screen to set the focal point, you'll see a sun icon next to the yellow focus box. The sun indicates that you can adjust the exposure level. Swipe up to brighten the exposure, or down to darken it.
While it's easy to adjust exposure in this way, it's useful to understand how the exposure is set when you tap to focus. It's actually very simple. When you tap to set focus, the camera sets exposure for that part of the scene.
So the area that's in focus will be correctly exposed, with plenty of color and detail. The examples below show how exposure is affected when you set focus on different parts of the scene.

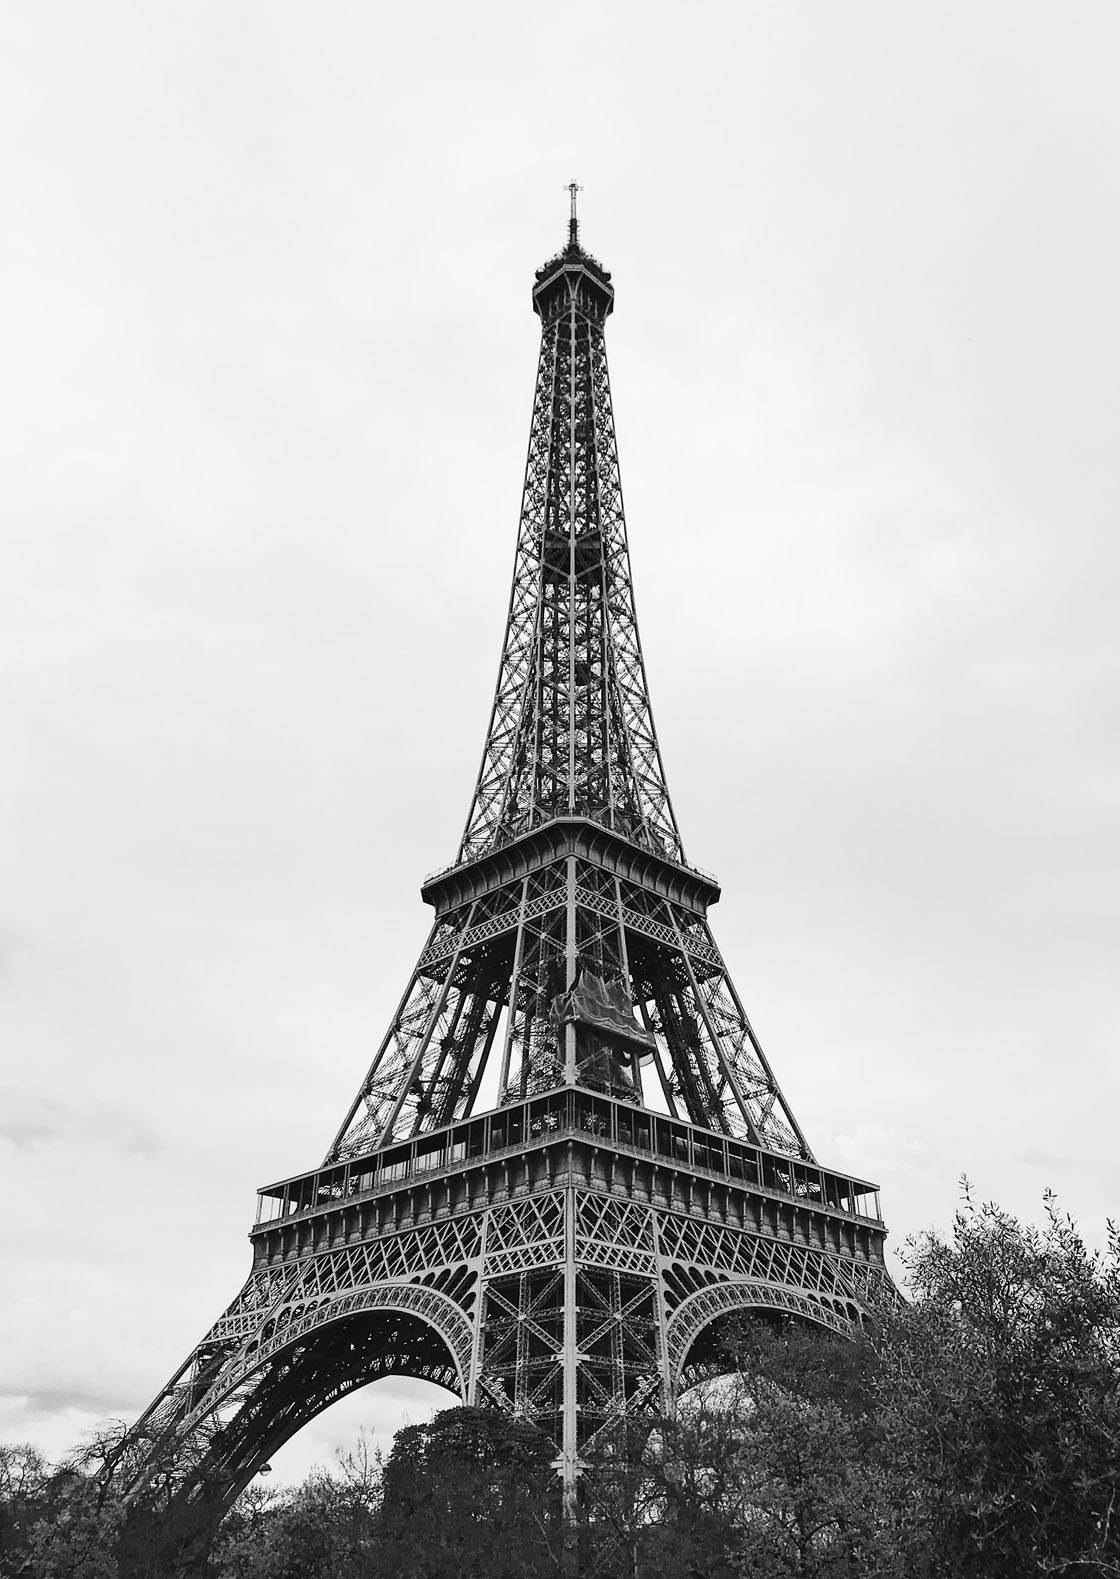
In the left photo, focus was set on the sky. Since the sky is bright, the exposure is automatically adjusted down to ensure this part of the scene has good color and detail. But as a result, the darker areas of the scene are under-exposed.
In the right photo, the focus was set on the foreground. Since this area is dark to begin with, the exposure is automatically increased to bring out the color and detail in this area. But this causes the sky to be over-exposed. All color and detail is lost, and the sky appears completely white.
Of course, you can swipe up or down to adjust the exposure levels after you've set focus. But with high contrast scenes, you won't always be able to get both the highlights and shadows exposed correctly… unless you use the HDR setting which you'll discover in tip 7 below!
7. Switch On HDR For Perfectly Exposed Photos
When you shoot a high contrast scene, with dark and bright areas, it can be tricky to get the exposure right.
A good example would be a landscape scene where you have a dark foreground and bright sky. In this situation, you can expose for the bright sky, but the foreground would end up under-exposed. Or you can expose for the dark foreground, but the sky would be over-exposed.
Luckily the iPhone camera has a great solution! The HDR setting in the Camera app helps you create perfectly exposed photos with color and detail throughout the entire scene.
What is the HDR meaning?
HDR stands for High Dynamic Range. It works by taking three photos whenever you press the shutter button. One is captured at normal exposure, one is slightly under-exposed, and one slightly over-exposed.
The camera then blends the best parts of these images to create one correctly exposed photo. The resulting image will be well lit, with color and detail in both the shadows and highlights.

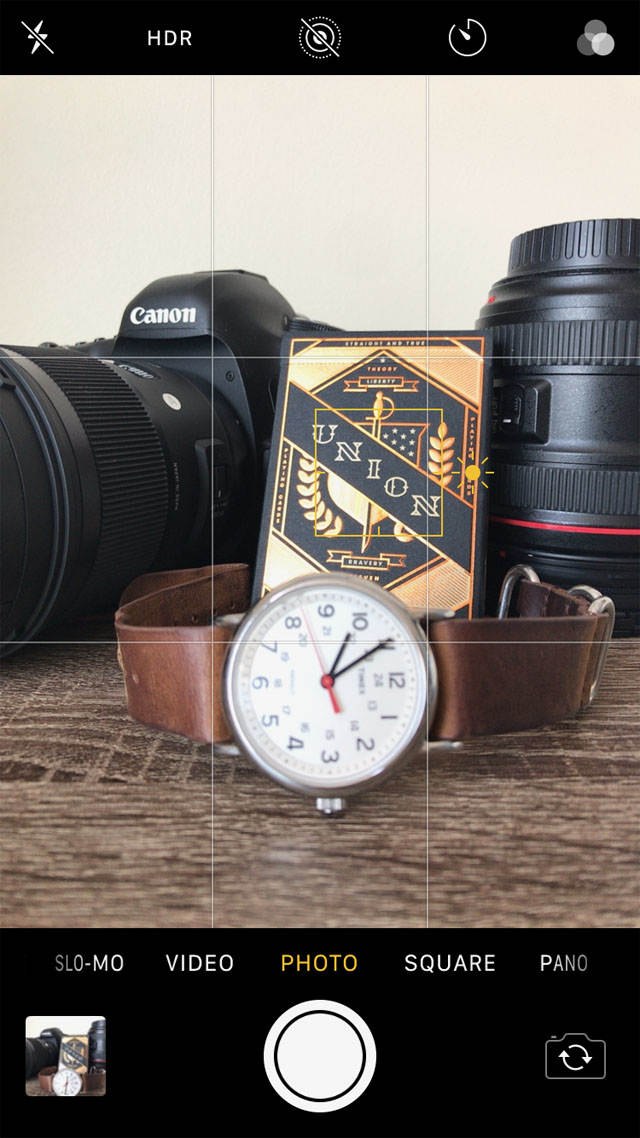
If you don't see the HDR option in your iPhone 8 Camera app, you'll need to adjust the HDR option in the Settings app. Go to Settings > Camera, then turn off the Auto HDR option.
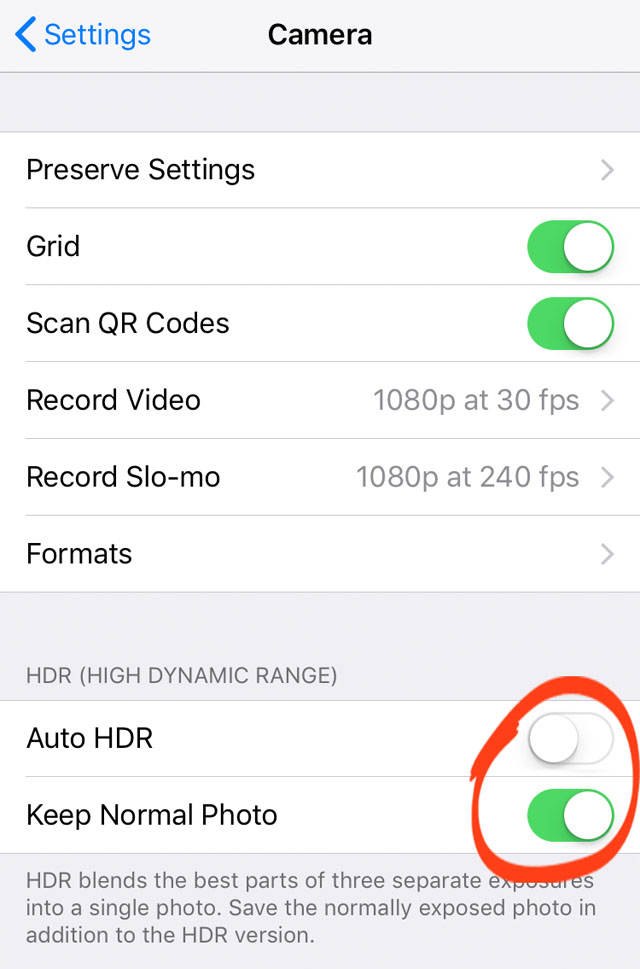
If the Auto HDR option is switched on, the camera will automatically decide when to use HDR. That means you won't be able to control the setting yourself.
Another important setting shown above is Keep Normal Photo. Switch this option on so the camera saves a normally exposed photo in addition to the HDR version. If you don't like the HDR photo, you always have the non-HDR image as a backup.
Close Settings, and return to the Camera app. To turn on HDR, tapHDR at the top of the screen, then selectOn. When HDR is on, you'll seeHDR in yellow at the top of the screen.
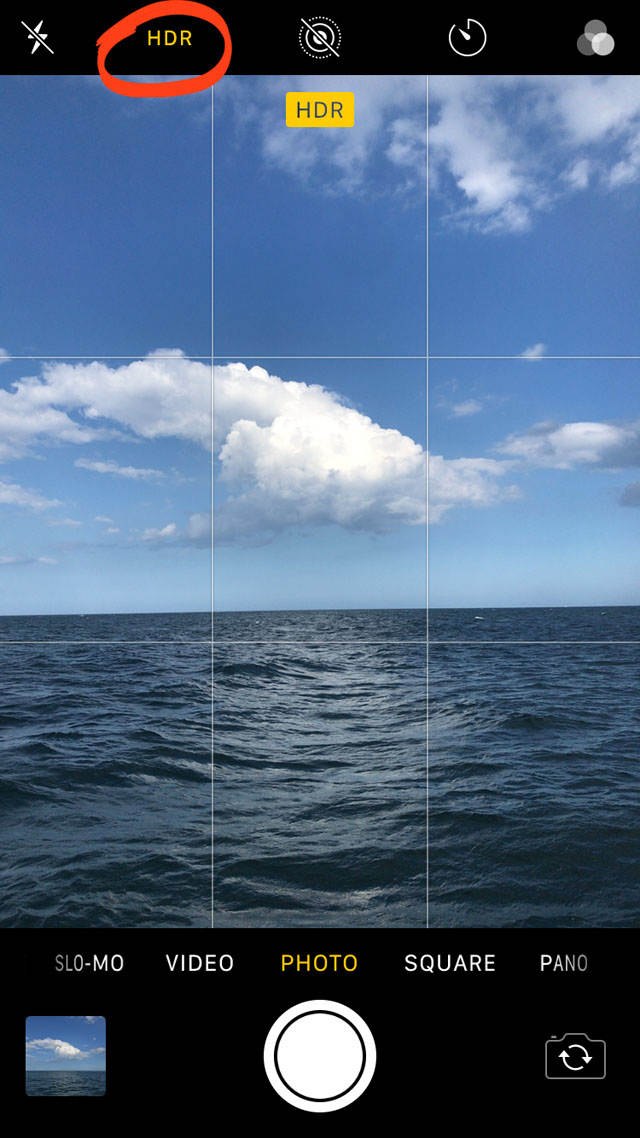
With HDR switched on, the camera will capture more detail in both the dark and bright areas of the scene.
Use HDR whenever you're struggling to get a balanced exposure in a high contrast scene. But when you don't need to use it, you can switch the setting off by tapping HDR > Off.
8. Use The Timer For Hands-Free Photography
The timer in the iPhone 8 Camera app lets you to set a delay between pressing the shutter and the photo being taken. This opens up some great new photo opportunities where you can shoot hands-free.
You can appear in the photo yourself as you no longer have to be behind the camera to press the shutter. This is perfect for group shots and self-portraits. If you're shooting a deserted landscape or urban location, try standing in the scene to add an interesting focal point.
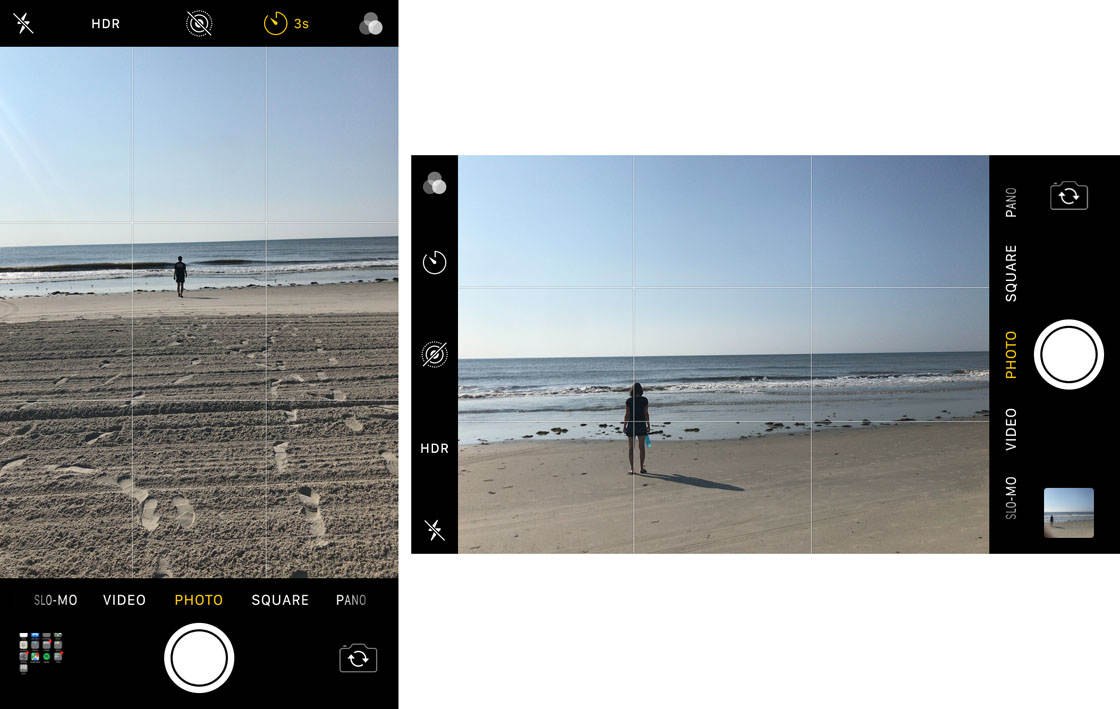
Use an iPhone tripod and iPhone tripod mount, or position your phone on a steady surface. Then tap the Timer icon at the top of the screen. Set a delay of either 3 or 10 seconds.
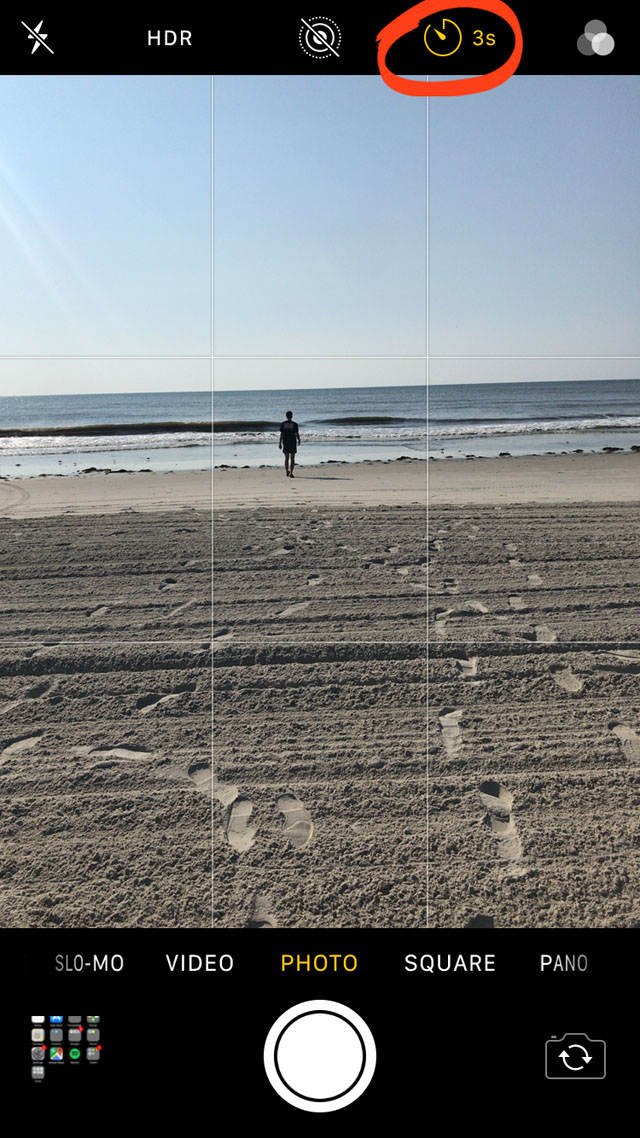
Compose your shot, then tap the shutter button. The timer will start counting down. Move into position ready for your photo to be taken.
It's also a good idea to use the timer if you're trying to avoid camera shake when shooting hands-free. Even with the camera on a tripod, sometimes you can introduce camera shake when you press the shutter button. Using the timer will solve this problem.
9. Use Burst Mode For Incredible Action Shots
Do you struggle to take great action shots with your iPhone 8? When photographing moving subjects, it's difficult to press the shutter at precisely the right time. Often you're a second too early or late, and the subject doesn't appear where you want them.
To maximize the chances of capturing the perfect action shot, you should use burst mode. This is a little-known feature of the iPhone camera. But once you discover burst mode, you'll have far more chance of taking incredible action photos with your iPhone.
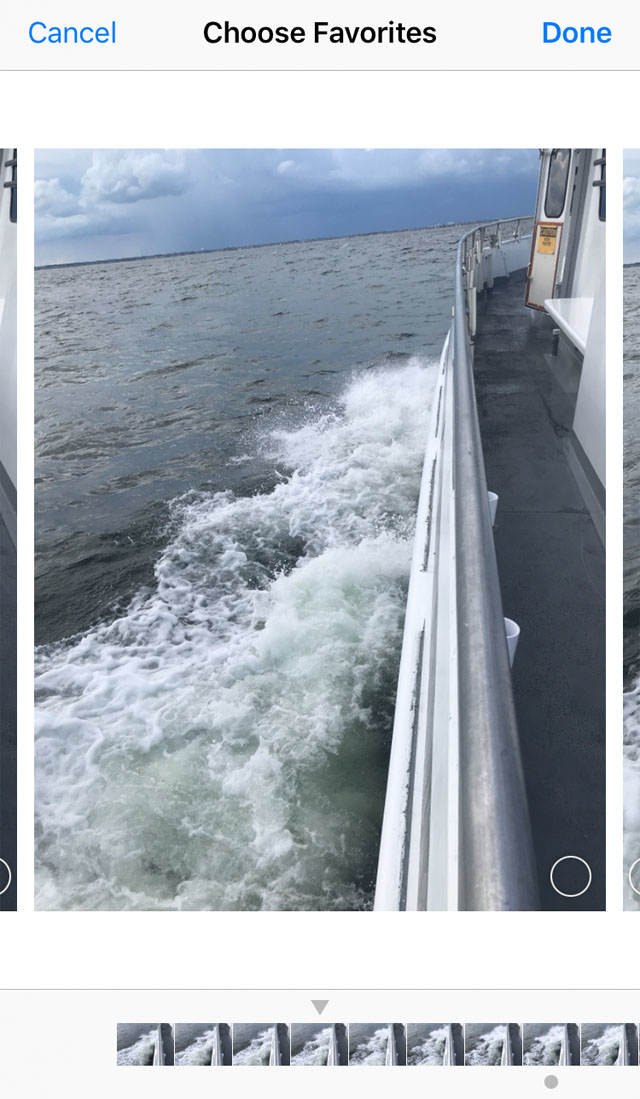
To activate burst mode, all you have to do is hold down the shutter button while taking your photos. The camera will capture a sequence of shots in quick succession. You can then keep the best photos, and discard the rest.
Your burst photos get saved in a stack in the Photos app. To see each photo captured during the burst, open the image in the Photos app, then tap Selectat the bottom of the screen. Select the images you want to keep, then tapDone.
Burst mode is a powerful tool for taking stunning action photos that no one will guess you've taken on an iPhone 8!
10. Bring Life To Your Images With Live Photos
Live Photos is an innovative feature on the iPhone 8 that lets you capture moving images with sound. It's perfect for situations where a still photo isn't enough to capture all of the sensory aspects of the scene.
If you find yourself in a setting where you want to remember the movements and sounds of your surroundings, try taking a Live Photo.
Tap the Live Photo icon (concentric circles) at the top of the camera screen. The icon turns yellow when Live Photos is active.
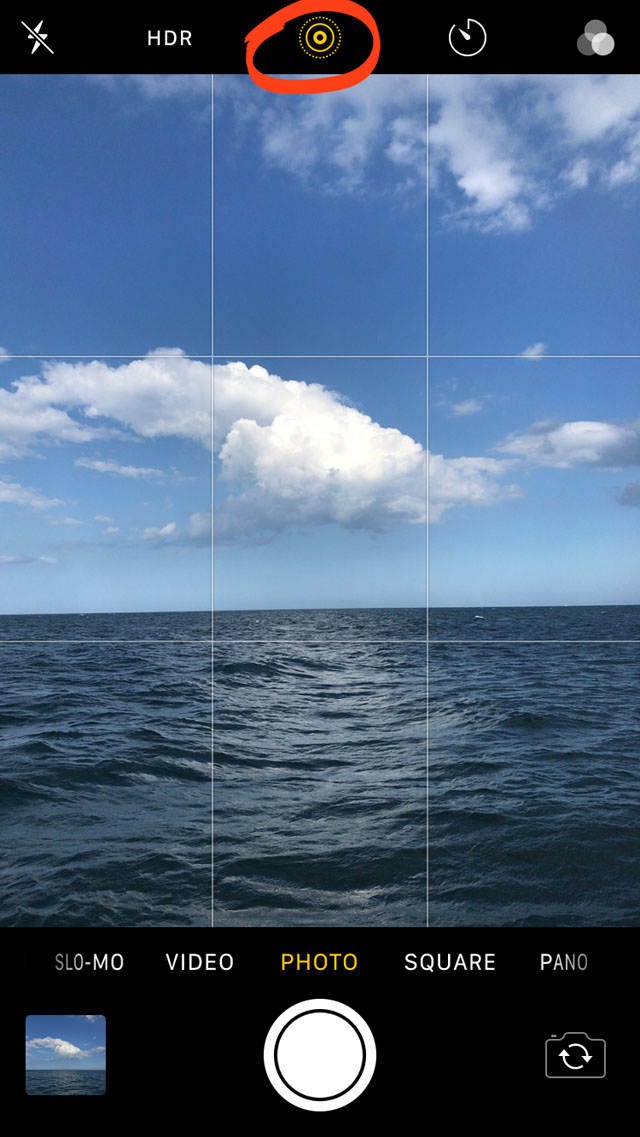
When you tap the shutter button, your camera records a video of the 1.5 seconds before and 1.5 seconds after the shutter is pressed. The result is a 3-second Live Photo, complete with movement and sound.
To view a Live Photo that you've taken, open it in the Photos App, then press hard and hold on the screen. The iPhone 8 screen is pressure sensitive. It recognizes that you're pressing harder than normal, and will play your Live Photo.
Once you've taken a Live Photo, you can polish it with some post-processing. In the Photos app, select the Live Photo, then swipe up. You'll see options to add a Bounce, Loop, or Long Exposure effect.
Loop turns your Live Photo into a beautiful, continuous video loop.
Bounce plays your Live Photo forward, and then in reverse, creating a "bouncy" feel to your footage.
Long Exposure creates a still photo with a slow shutter effect. Any movement will appear smooth and blurred out, creating a peaceful, soothing picture. This is perfect for creating long exposure photos of waterfalls, rivers and waves.

11. iPhone 8 vs iPhone XR & iPhone XS Camera
Are you wondering how your iPhone 8 camera features compare to the newer iPhone XS camera? How about the iPhone XS Max and the iPhone XR?
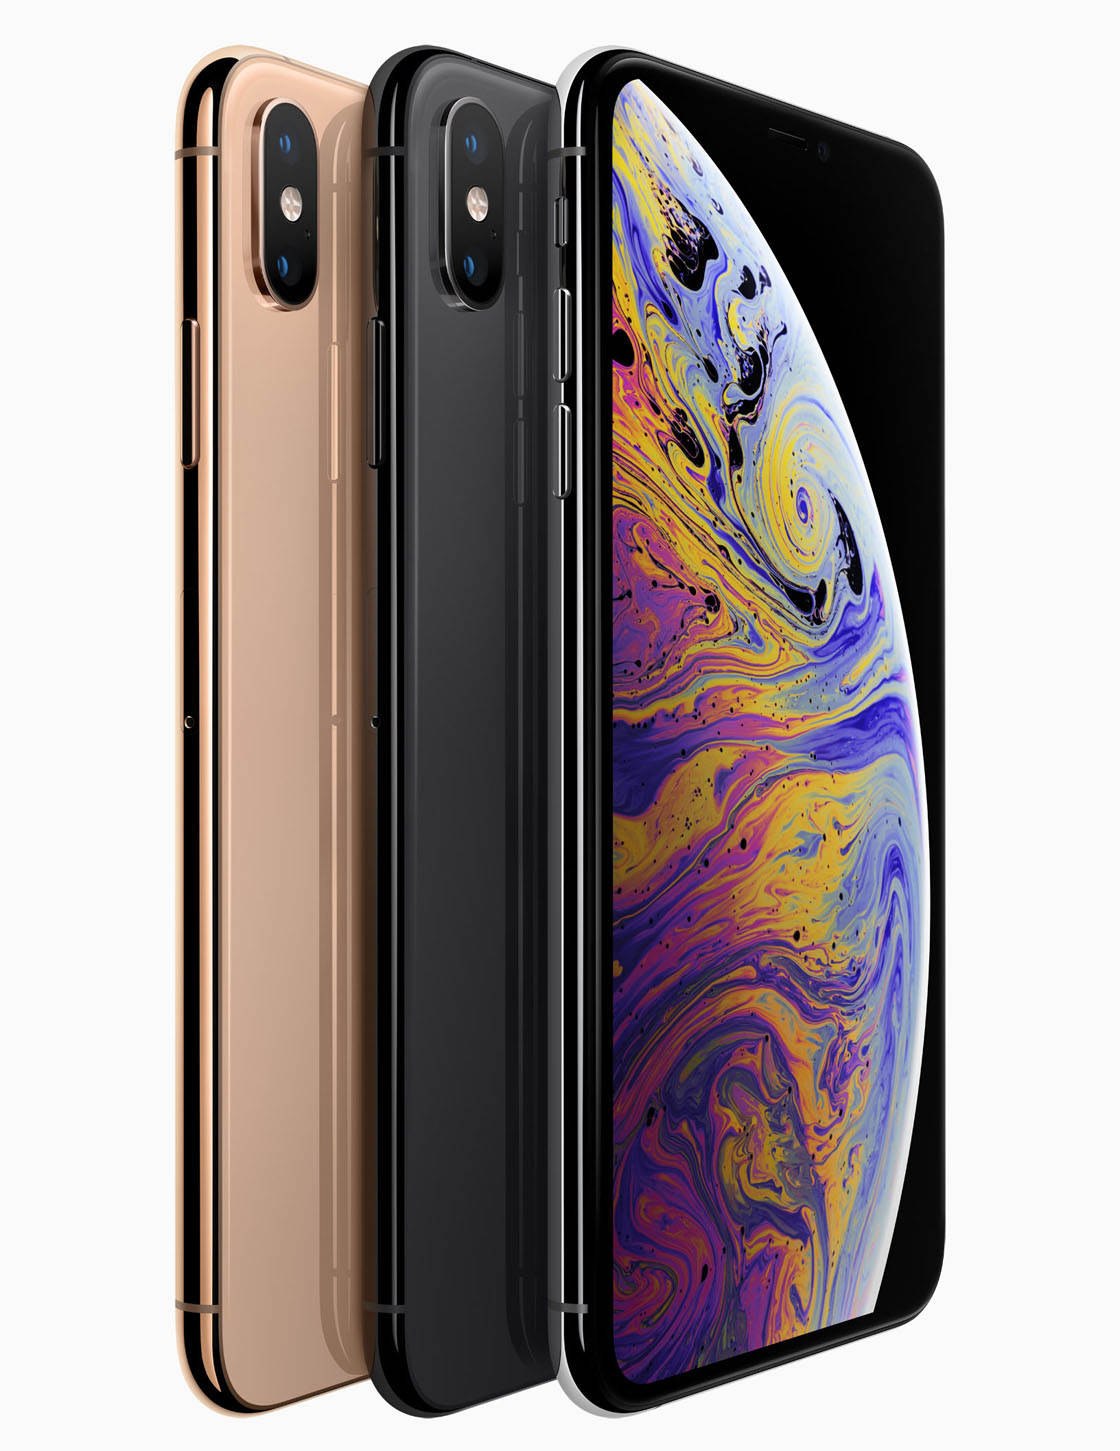
The iPhone XS and XS Max have a dual lens system. In addition to the standard wide angle lens that you have on your iPhone 8, the iPhone XS and XS Max also have a 2x telephoto lens.
A telephoto lens allows for the capture of high-quality zoomed-in images. On your iPhone 8, you don't have the additional telephoto lens. You can use digital zoom by pinching outwards on the camera screen, but this isn't recommended as it degrades the quality of your photo.
So with your iPhone 8 camera, it's always better to move physically closer to your subject, rather than using the zoom feature.
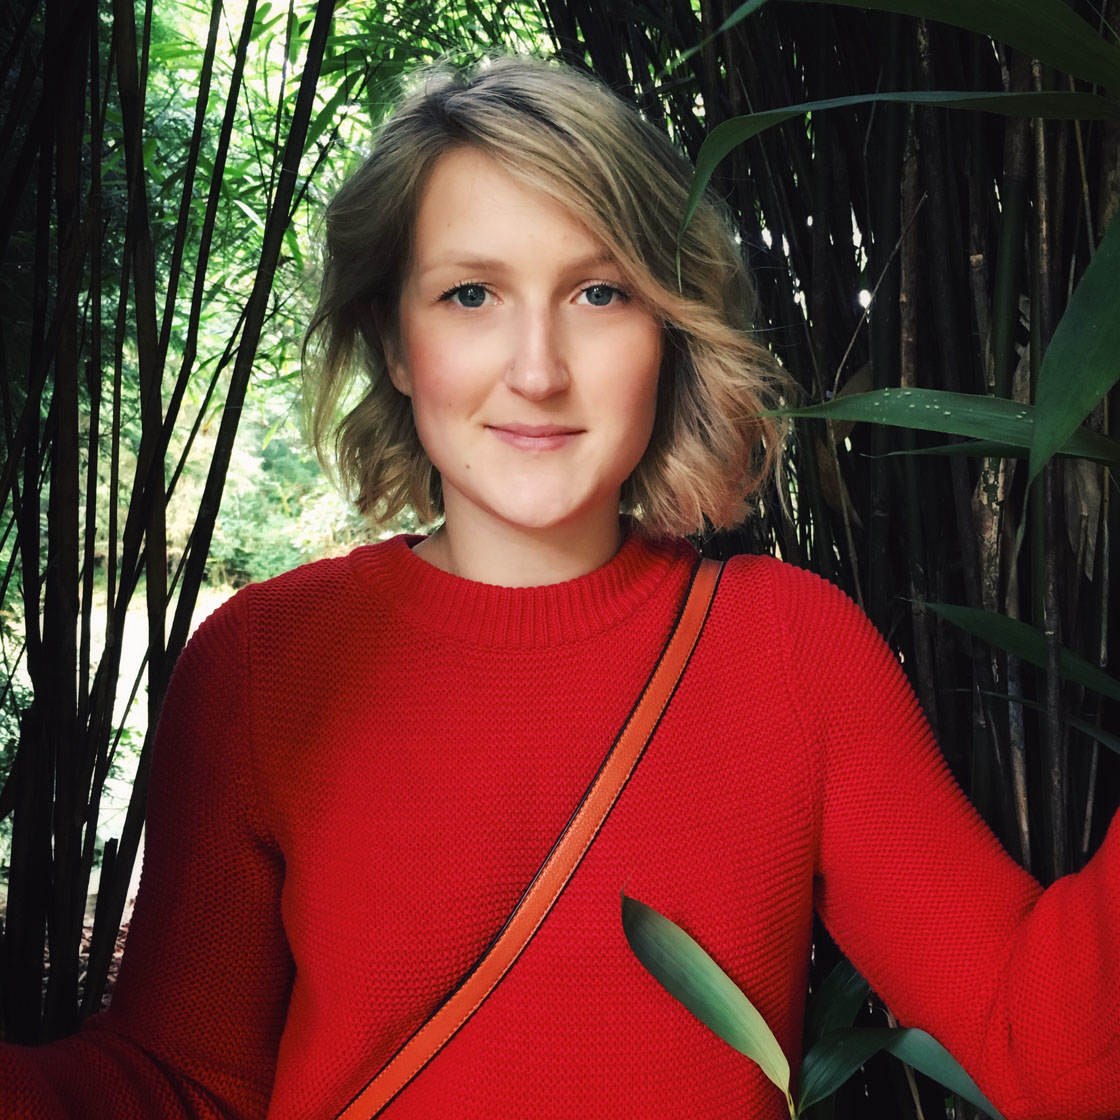
Another benefit of a telephoto lens is that you don't get any wide angle distortion. This makes it perfect for portrait photography as it avoids unflattering photos where the subject's nose appears larger than it really is.
So how do you avoid this problem of wide angle distortion on your iPhone 8? The trick is to not get too close to your subject. The closer you are, the more exaggerated the distortion will be. So take a step back, and check that the subject's facial features don't look distorted. You can always crop in a bit closer in post-processing.
Another difference between your iPhone 8 camera and the new XS, XS Max and XR is Portrait mode. This shooting mode lets you create a shallow depth of field to blur the background in your iPhone photos. And the Portrait Lighting feature allows you to add different lighting effects to your images.
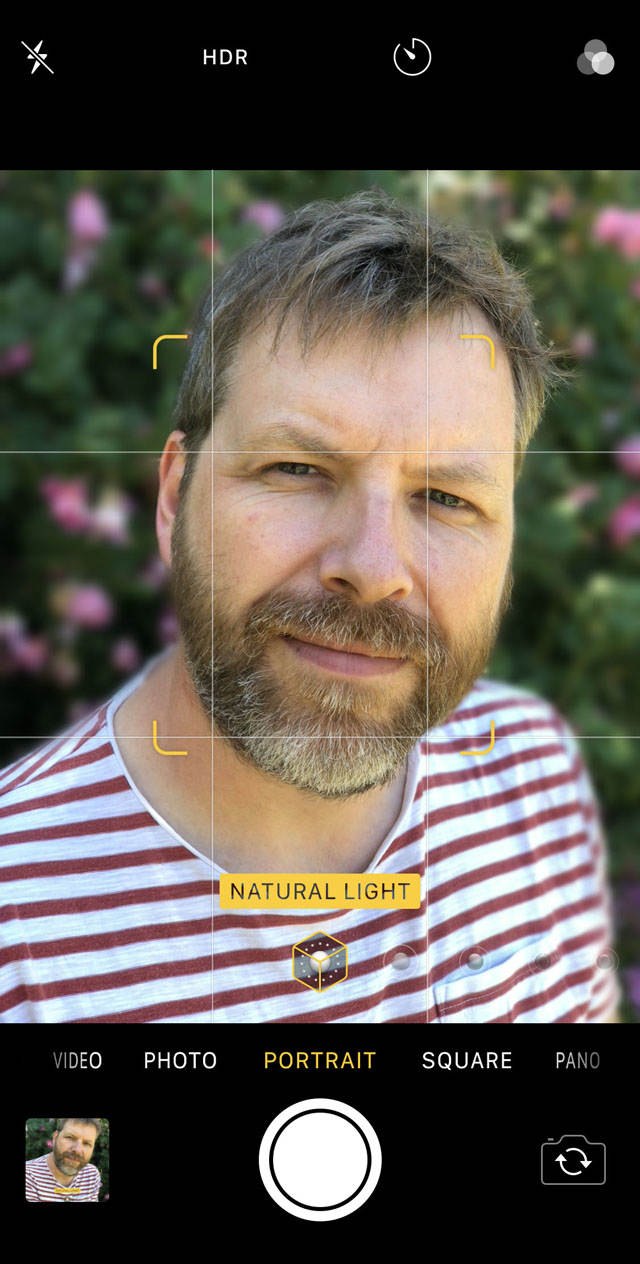
Unfortunately, your iPhone 8 camera doesn't have Portrait mode. But that doesn't mean you can't create stunning images with blurry backgrounds on your iPhone 8.
All you need to do is move closer to your subject to create a shallow depth of field. And you can always use the AfterFocus app to blur the background in post-processing.
One more camera setting to mention is Smart HDR. This is a new feature on the iPhone XR, XS and XS Max that lets you shoot stunning HDR photos of moving subjects.
The standard HDR feature on your iPhone 8 is great for capturing perfectly exposed photos in tricky light conditions. But it doesn't always produce good results if the subject is moving. So it's best to photograph stationary subjects when using HDR on your iPhone 8.
Click here to find out more about the incredible camera features of the iPhone XS, iPhone XS Max, and iPhone XR.
Do you want to compare the iPhone 8 camera with the iPhone 8 Plus camera and iPhone X camera? Then check out our discussion of the iPhone 8 vs iPhone 8 Plus vs iPhone X camera.
How To Take Great Pictures With Iphone 8
Source: https://iphonephotographyschool.com/iphone-8-camera/
Posted by: dukesquoinep.blogspot.com
0 Response to "How To Take Great Pictures With Iphone 8"
Post a Comment